
Step-by-Step Instructions
- 01: Things to Consider Before Building a Freestanding Deck →
- 02: Install the Footings →
- 03: Install the Post and Beams →
- 04: Build the Deck Frame →
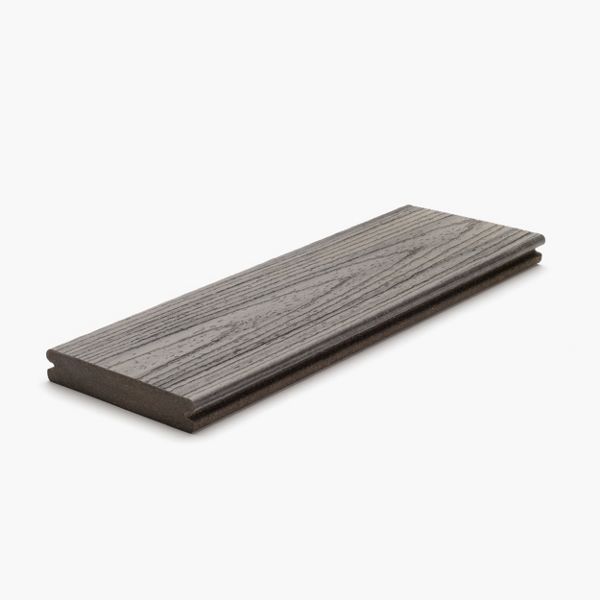
- 05: Install the Decking →
- 06: Install the Fascia →
- 07: Accessorize and Enjoy! →
Chapter 01: Things to Consider Before Building a Freestanding Deck
Print Instructions
The city or neighborhood where you live and the materials you choose will have a lot to do with the location, shape, and size of your freestanding deck. Here are some important things to consider to help you design your new favorite outdoor space.
Step 1: Permits, Zoning Codes, and Utilities
Your very first step in building a freestanding deck is to speak with your local building official about acquiring a building permit and asking about any restrictions that might apply to your project. Many municipalities impose size limitations and require minimum setbacks from lot lines. HOAs often have rules that might mandate particular design parameters and specify which materials or colors you can choose. And always call 811 and have all your utilities located before digging any holes for the posts.
Step 2: Choosing Deck Materials
When you compare and contrast the considerations below, it becomes clear that building with composite decking is a choice you can feel confident in having made many years after your deck has been built:
- Cost
- Appearance
- Ease of installation
- Durability
- Longevity
- Maintenance required
- Warranty
Find more information about how to compare decking materials here.
Step 3: Design Your Deck
Start with length and height considerations. Trex deck boards are available in 8-, 12-, 16-, & 20-ft. lengths, so if you build a deck 11-1/2 ft. long instead of 12 1/2 ft., then you can use 12-ft. boards and end up with very little waste. If you don’t want to incorporate a railing, you might want to keep the height of your freestanding deck under 30 in. Many municipalities will require railings at heights taller than that. The height will also affect how many steps are needed and how tall each step needs to be. To simplify the whole design process, Trex Deck Designer Software is easy to use, will allow you to create a blueprint that you can use to apply for a permit, and will create a list of materials you will need. Learn all the parts of a deck anatomy.
Step 1: Prepare the Site
Identify and relocate any irrigation lines and sprinkler heads that could be obstructed or damaged by your new freestanding deck. Remove or trim shrubs and use a vegetation killer on any unwanted growth beneath the deck. Ensure the ground slopes away from the planned footing locations. Excessive moisture absorption by the soil around the footings could compromise their structural integrity, making them susceptible to lifting due to the freeze/thaw cycle.
Step 2: Determine Footing Size and Depth
The width of your footings will depend on the amount of weight each one will have to support. And the depth will depend on the region in which you live—The colder the climate the deeper your footings will have to be buried. Local planning and zoning departments (or whichever government department is responsible for issuing building permits in your area) will likely be able to advise you on footing size. For elaborate and complicated deck designs, you might need to consult an engineer. Your local lumber supplier may have one on staff or be able to recommend one.
Step 3: Locate Footing Locations
To find the precise location for your footings, you will want to use a mason’s string line to lay out the perimeter of the deck and beam locations. If the deck is small enough, you might be able to build the frame first, set it in place to locate the footings, and then move it out of the way when you dig the holes.
Step 4: Dig Holes and Pour the Footings
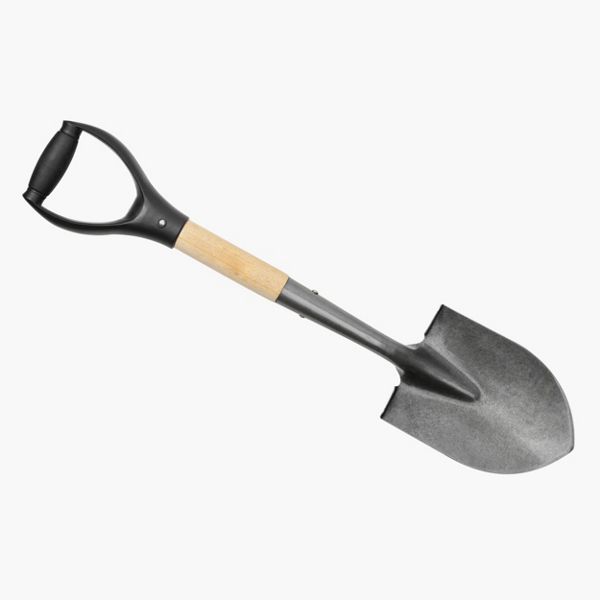
You could dig the footings with a shovel or a post-hole digger or rent a powered post-hole digger from a rental center. You could fill the hole with concrete or insert a concrete form tube first. Mixing bags of concrete is a good option for decks with just four small footings. If you have more than four large footings, you might want the concrete delivered on a truck from a concrete plant.
Step 5: Install a Weed Barrier
Install a weed barrier landscaping fabric to prevent weeds from growing up under your freestanding deck. You could cover the perimeter of the fabric (those areas that will be visible) with a decorative rock to conceal and protect the fabric. It’s easier to do this after the footings are in because the fabric will make it harder to dispose of the dirt left over from digging the holes. Just make sure you buy a fabric that is hardy enough to handle a little foot traffic during the deck construction process.
Step 1: Install the Post Anchors
Measure and mark the locations of the posts on the top of the footings. In addition to proper spacing, the posts need to form a square or rectangle with perfect 90 degrees. corners. You can accomplish this by measuring diagonally both ways between the posts. You know that all four angles are exactly 90 degrees when both diagonal spans are the same distance apart. Install post anchors at those locations.
Step 2: Cut and Set the Posts
Cut four posts longer than the desired distance between the top of the footing and the top of the drop beam and install them onto the anchors as plumb (straight up and down) as possible using just one fastener at this point. Using a laser level, water level, or a long straight board in conjunction with a 4-ft. (or longer) level, mark the desired locations of the bottom and top of the drop beams on all four posts. Remove the posts, cut them to length, and notch out the top of the post to create a ledge for the beams to rest on. Reinstall the posts onto the anchors, and again, secure them with just one fastener in each post.
Step 3: Cut and Set the Beams
Cut the beams to size. Install them onto the posts using just clamps or one fastener for starters. To keep the deck height lower, it is possible to set the beams directly on the footings. If you choose to go that route, the height of the footings would all have to be level.
Step 4: Brace and Fasten the Posts and Beams
When all the posts are plumb, the beams parallel, and the ends of the beams create a perfectly square rectangle, use temporary bracing to hold everything in place. Once secure, finish fastening the posts to the anchors and the beams to the post. Add a flashing membrane to the top of the beams before building the frame on top of them.
Step 1: Build the Perimeter
Start by marking the crown on all your joist lumber. The crown is the side of the lumber that is bowed out. Install all the joists with the crown orientated upwards. Start by assembling the perimeter of the deck frame. Don’t fasten the frame to the beams until you know that the frame is evenly spaced on the beams and that it is perfectly square. Once aligned, fasten the joists to the beams using a structural fastener sometimes called rafter ties or hurricane clips.
Step 2: Install the Joists
Install the rest of the joists with screws or nails, but only fasten them to the band joists (the two end joists that are perpendicular to the rest) for now. You will secure them to the beam after you know they are aligned properly. Unfortunately, not all wood joists have the same widths. If you come across one particularly small joist, let's say 1/4 in. smaller than the rest, attach it to the band joists so the tops are flush and then add 1/4 in. shims under the joist where it sits on the beams. If one joist is 1/4 in. wider than most of the others, you would need to plane 1/4 in. of wood off the joist where it rests on the beam, shave a 1/4 in., off the joist itself, or add shims under all the other joists.
To watch the step-by-step to install joists watch the Trex Academy video here.
Step 3: Straighten and Install Structural Hardware
Once all the joists are in place, run a mason’s string/line along the length of one of the band joists to make sure that it's perfectly straight. You will likely have to tap in or pull out a few of the joists. Once the band joist is straight, use the string to double-check the opposite band joist, then double-check the squareness of the overall frame one more time. If everything is looking straight and square, secure the joists to the beams with structural ties or clips, and then secure the ends of the joists to the band joists with joist hangers.
Step 4: Add Blocking
Installing blocking down the middle of the frame will make a deck feel more stable. Blocking can also help prevent wet-treated joists from bowing further up as they dry, which could result in a wavy surface. Add more than one row for very large decks. You will need to install extra blocking for posts if your freestanding deck will have a railing. If you plan on installing an accent or border to create a picture frame around the perimeter of your deck, now is the time to install the extra blocking to help you fasten those boards as well.
Step 5: Install Bracing
Once all the blocking is in place, remove the temporary bracing and check to see how sturdy the frame is by standing on top of it and trying to make it sway back and forth. While the deck boards will add stability once they’re installed, at this point the frame should feel strong and stable. Because freestanding decks are not attached to an immovable object like a house, they are more prone to swaying. Taller freestanding decks with longer posts will likely need knee bracing to help keep them stable. If the beams are secured directly to the footings, bracing won't be necessary.
Step 6: Build the Step/Stairs
Decide on the number and width of steps you need then construct a frame that matches these measurements. It helps to design the size of the steps so that two full-sized deck boards with a gap in the middle work on each tread, and don’t forget to allow for the extra height the deck boards will add to both the step and the surface of the deck. You could attach the step to the frame and support it with posts or you could pour a concrete landing to support the step. Click here for more information about building steps/stairs.

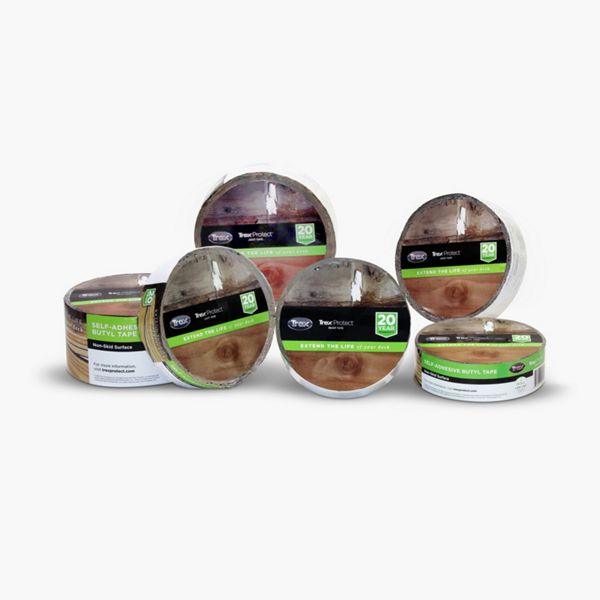
Step 7: Protect the Frame with Flashing Tape
Trex Protect™ tape is a weatherproof barrier that protects the top of your deck joists, beams, and posts from moisture, preventing rot and decay. Make sure you clean off any dust or debris from the surface of the lumber before installing the tape. To install Trex Protect, simply remove the tape’s backing as you roll it out over the joist, and then run your hand or a roller over the top and firmly press it into the wood.
Step 1: Install Picture Frame Boards (if applicable)
If you plan to create a picture frame, install the boarder boards first. The deck boards that comprise the frame should be held out past the joists far enough so that they will overlap and cover the entire width of the fascia. Use flat-edge rather than grooved-edge boards. You can hold the miters together tighter by using a combination of construction adhesive and pocket holes or biscuits.

Step 2: Cut the Boards to Length
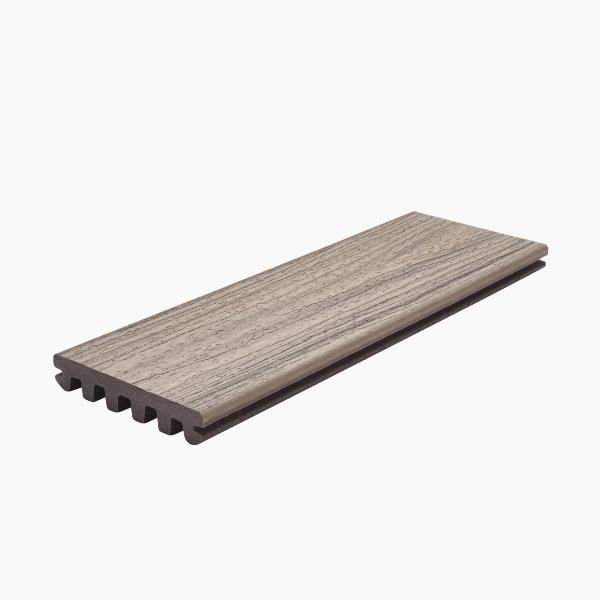
The ends of new composite deck boards are not always perfectly square. Before installation make sure to trim at least 3/16 in. off each board. If you are not going to create a picture frame, cut the boards flush with the ends of the joists. You will create a gap when you install the fascia (see more below). You could cut each board to length, or start boards flush on one end, run them long on the other, and then trim the long ends down with a circular saw after they have been installed. Just make sure that you don’t damage the joist flashing membrane in the process. If you don’t use hidden fasteners, you will need spacing tools to maintain a consistent gap between each board. Find out more about deck board spacing here.

Step 3: Install the First Deck Board
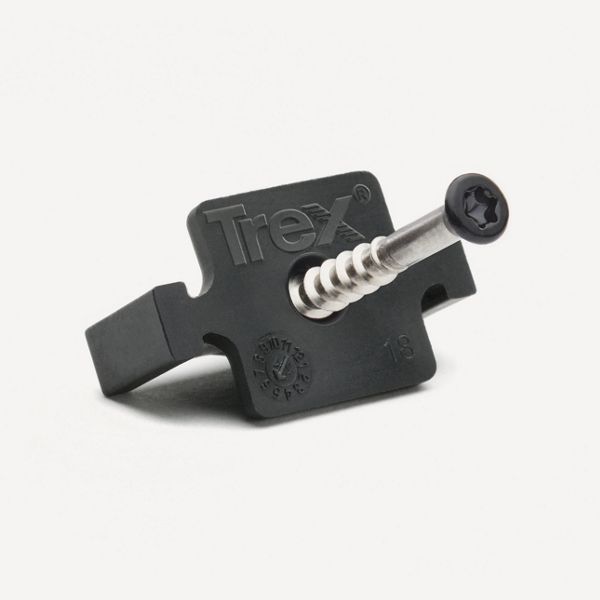
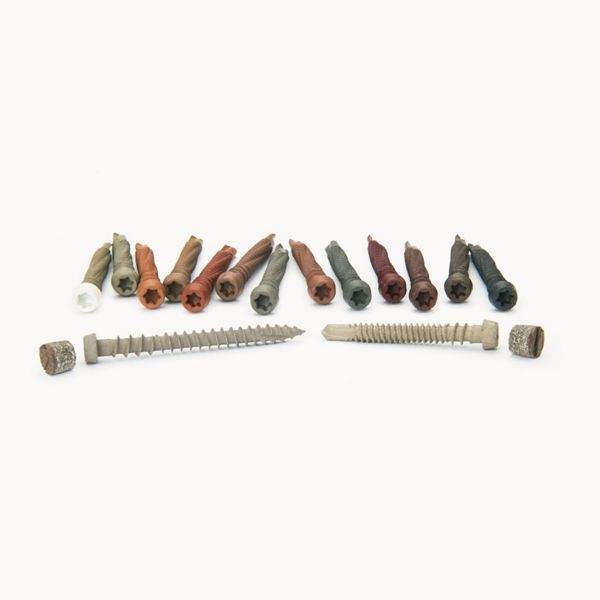
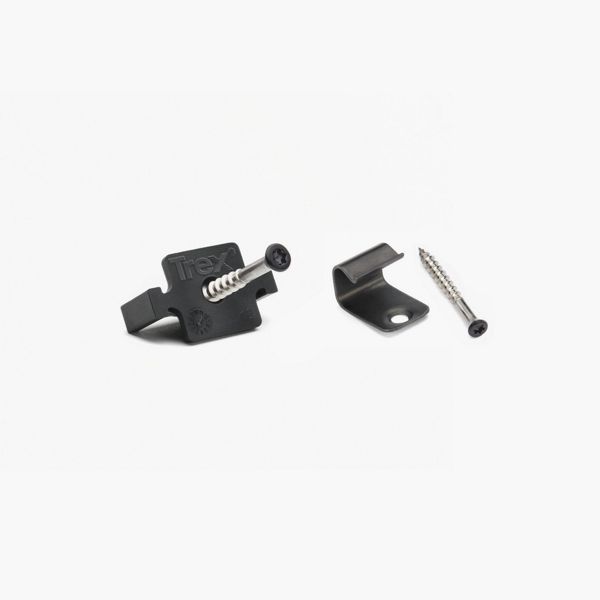
Install Trex Hideaway® Universal Starter Clips flush with the outer edge of the band joist. Slide the groove of the first deck board onto the clips. Press the board firmly into the starter clips and install a Trex Hideaway® Hidden Fastening Clip in the groove on the opposite side of the board at each joist. Only partially fasten each clip. Start the first row on the most conspicuous side of the deck because the last board will likely need to be ripped down to size, and you'll want that end to be less visible.
Also, before you install your first board, you will want to determine where the last board will land. If it looks like the last board will end up being very small, you might want to rip the first board down so the last board will be large enough to install properly. The other fastening options for the first board are to secure it with composite screws or screws and plugs.
Step 4: Continue Installing Boards with Hidden Fasteners
Slide the groove of the second board onto the fastener clips that were installed on the first board. Press the board firmly into the existing clips and install another row of clips into the exposed groove on the second board, only partially securing each clip to each joist. Now you can go back and fully secure the first row of hidden fasteners. Follow this procedure for the rest of the boards: Install board; partially install clips; go back and fully secure the previous row of clips; repeat.
For square or rectangle-shaped decks, periodically measure from each end of the deck boards to the band joist to make sure the last deck board will be a consistent size. You might also want to periodically string a chalk line along the edge of a row to make sure the boards are being installed perfectly straight. To secure the outside edge of the last board, install either Trex Deck Plugs through the top surface, or predrill a hole at an angle through the side of the deck board and then fasten the board with composite deck screws. Finish, by installing deck boards to the steps.

Pro Tip
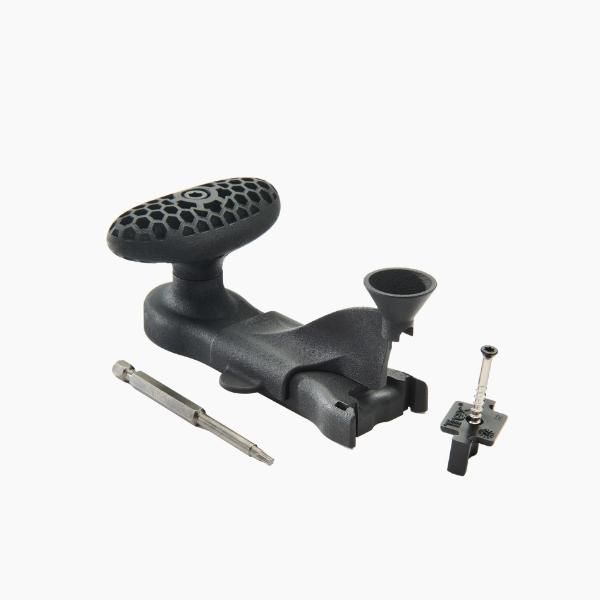
Speed up the Process with an Installation Tool
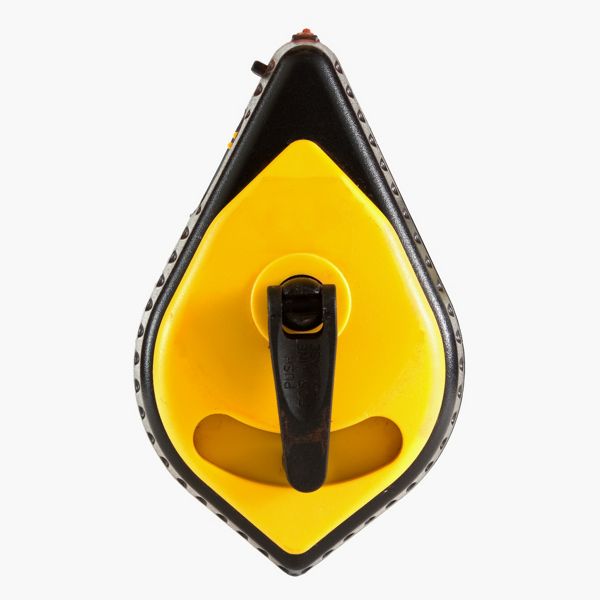
When using Trex Hideaway® Universal Fasteners, the Trex Universal Fastener Installation Tool can speed up the installation process by up to 50%. Each fastener snaps into the tool, reducing the chance of dropping them. The nose cone guides the bit precisely into the screw heads, and the handle provides the leverage you need to keep pressure on the boards while you secure them. There’s even a handy bit holder at the bottom of the tool.
Step 1: Install Spacers
There is always the potential for water to get trapped between the fascia boards and the joists, which could damage both over time. If you choose to install the top of the fascia boards flush with the top surface of the deck boards, it’s important to install spacers between the fascia boards and the joists.
This will create a gap for water and debris to pass through and allow air to dry out both boards after a rain event. The spacers can be made out of weather and insect-resistant wood, composite material, or PVC. Make sure to place the spacers so that the fasteners penetrate both the fascia and the spacers. Installing a fascia fastener without a spacer behind it will cause the board to noticeably bow in at that spot.
Step 2: Cut to Fit
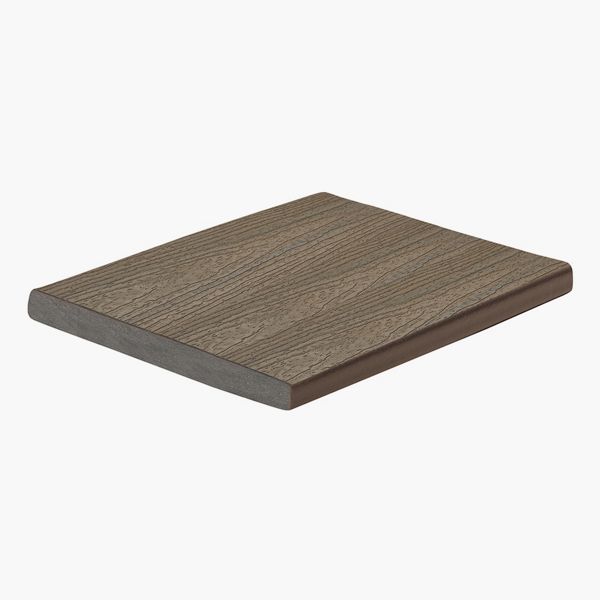
If necessary, rip down the fascia boards so they are wide enough to reach the top of the deck boards and extend down about 1/2 in. past the bottom of the joists. Use a miter saw to cut the fascia boards to length. Mitered corners will conceal the end grains on the fascia boards, and creating mitered butt joints (scarf joints) will result in a gap between the boards that is less conspicuous.
Step 3: Predrill Holes for the Fasteners
It’s easier to predrill the fastener holes into the fascia boards before installing them. The location and amount of fasteners required depends on the width of your joists and whether or not you are using composite decking screws or screws specifically designed for fascia boards. You can find the exact fastening guidelines for Trex fascia boards in the Trex Installation Manual. Creating a fastener spacing jig will speed up the predrilling process and result in consistent spacing and a professional-looking final product.
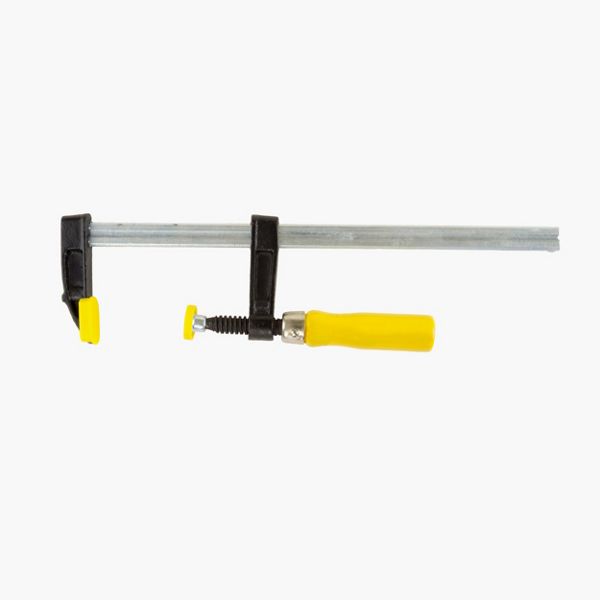
Step 4: Fasten the Fascia Boards
Use clamps to hold the boards tight to the joists while you fasten them. Fastening both ends of a long facia board first can cause the board to bow out in the middle. It’s always best to start in the middle and work your way out towards each end, or on one end and work your way down to the other end. A Trex Depth Setting Tool will help you drive all the screws at a consistent depth and prevent overdriving which will reduce the screws' holding power.
You’ve done it! Your freestanding deck is now complete! Consider adding finishing touches such as accent lighting and comfortable furniture, before you invite your neighbors, friends, and family over to enjoy some great food and favorite beverages on your beautiful new Trex freestanding deck.


This content was partially or fully generated by AI and has been reviewed by our team to ensure accuracy and relevance.
(NOT ALL PRODUCTS ARE AVAILABLE IN EVERY COUNTRY.)

Copyright © 2026 Trex Company, Inc. All rights reserved.
Photos and videos © 2026 Warner Bros. Discovery, Inc. or its subsidiaries and affiliates. All trademarks are the property of their respective owners. All rights reserved.
- Country
-
Australia
-
Austria
-
Bahrain
-
Brazil
-
Canada English
-
-
Chile
-
Colombia
-
Costa Rica
-
Cyprus
-
Czech Republic
-
Fiji
-
France
-
Germany
-
India
-
Ireland
-
Israel
-
Kuwait
-
 Lithuania
-
Mexico
-
Netherlands
-
New Zealand
-
Norway
-
Oman
-
Qatar
-
Saudi Arabia
-
South Africa
-
Spain
-
Sweden
-
Switzerland
-
Turkey
-
United Arab Emirates
-
United Kingdom
-
United States
-
Venezuela
By choosing your country, you acknowledge that you have read Trex's Privacy Policy